|
|


Glen Frazer Free-mo Module - Restoration
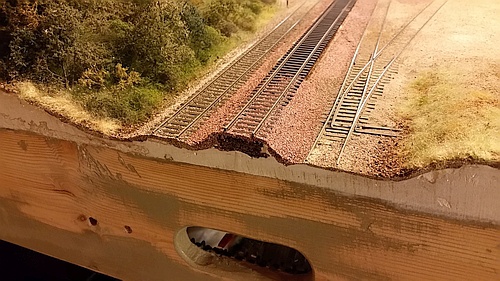
After 15 years of transport, set-up, and tear-down, the module's track developed a
"roller coaster" profile. This caused trains to spontaneously break in two (uncouple) as the
cars' couplers moved vertically through the hills and dales. Consequently, in 2015 Glen Frazer
was taken out of service while the root cause of this issue was studied and solutions explored.
Apparently, over time the Liquid Nails latex glue used to attach the foam tops to the wooden
frames became brittle, and the foam tops shrunk and warped (possibly due to slow outgassing
of the foam material). These two factors caused the foam tops to pull away from the wooden
frames, resulting in a small hill at the center of each section and dips at the section joints.
To get Glen Frazer operational again, restoration began in late 2018 and extended well
into 2019. On the Derail, Loading Ramp, and West Switch sections, the foam tops were
stabilized relative to the wooden frames, the main track was replaced, and the worst dip on
the siding track was repaired. Also, all the MSS hardware was upgraded to V2.0 compliance,
the end pigtail connectors were updated to PowerPoles to comply with current Free-mo
standards, and the LocoNet throttle bus and panels were completely replaced.
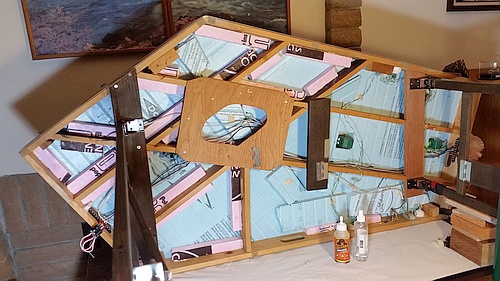
Below: The Derail section with about half the pink foam
blocks in place. This section could be on its side while the
foam blocks were installed because the foam top had been
re-glued to the frame during the failed 2015 ad-hoc repair.
blocks in place. This section could be on its side while the
foam blocks were installed because the foam top had been
re-glued to the frame during the failed 2015 ad-hoc repair.
Below: The old MSS hardware consisted of
individual boards for each function with a
rat's nest of wiring interconnecting it all.
individual boards for each function with a
rat's nest of wiring interconnecting it all.
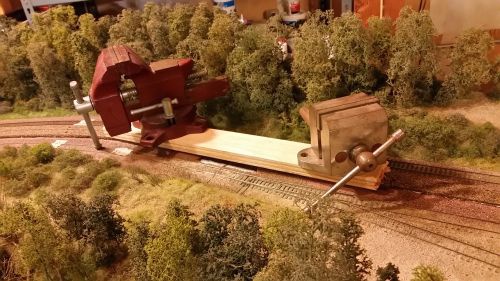
Below: Great risk results in great reward - hopefully. The
styrene shims were Gorilla-glued in place and a heavy
vise used as weight to keep everything flat as things cured.
styrene shims were Gorilla-glued in place and a heavy
vise used as weight to keep everything flat as things cured.
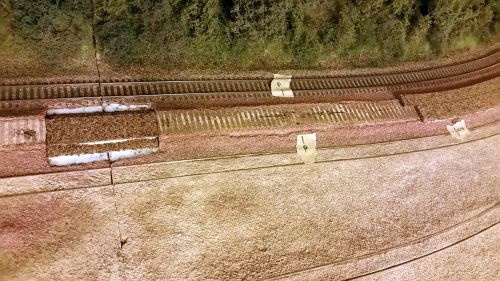
Below: The completed shims under the siding track, background.
At center, the cork under the main track had to be removed and
repaired - the track had been soldered to PCB tie plates at the
section joints, and they did not come out cleanly.
At center, the cork under the main track had to be removed and
repaired - the track had been soldered to PCB tie plates at the
section joints, and they did not come out cleanly.
Below: The replacement cork at the Derail/Ramp section
joint is curing with heavy weight holding it in place.
joint is curing with heavy weight holding it in place.
Below: The new cork at the Ramp/West Switch section
joint. Tape was used to mark where power feeds come
up through the trackbed - the wires were re-soldered to
the new track when it was installed later.
joint. Tape was used to mark where power feeds come
up through the trackbed - the wires were re-soldered to
the new track when it was installed later.
Below: The flex track was pre-formed to match the centerline
curves. Intermediate rail joints were soldered to create lengths of
contiguous track to cover each section. The power feed wires
were soldered to the rail undersides (green and white wires). With
the assembled track raised on foam blocks, latex Liquid Nails glue
was spread thinly on the cork. The track was then pressed into the
glue, carefully aligning it on the centerlines. As the glue slowly
cured, rail spikes were installed as needed to hold the track in
place, and bubble levels were used to ensure side-to-side level.
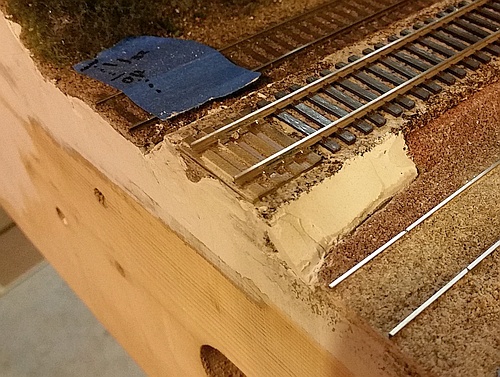
Below: Track centerlines, including easement curves, were
marked on the repaired cork roadbed using black Sharpie
pens. Before installing the new Walthers/Shinohara code 83
track, printed-circuit-board (PCB) tie plates were glued in
place at the section joints. These have copper pads to which
the rails are soldered - this reinforces the rail attachment to
prevent accidental track damage during module handling.
The last 1/4" of rail was left loose - at setup time, a "floating"
rail joiner is slid across the joint to ensure rail alignment.
Below and Right: On the East Switch section, the most offensive track
issue was a significant "roll-off" (drop) at the Free-mo endplate. I used
a hacksaw blade to undercut the existing PCB tie plate, and made a
styrene wedge to raise the track end.
issue was a significant "roll-off" (drop) at the Free-mo endplate. I used
a hacksaw blade to undercut the existing PCB tie plate, and made a
styrene wedge to raise the track end.
With the track now repaired and the electricals back in place, Glen Frazer was successfully tested in mid-2019 in a Free-mo layout
in Bakersfield, CA. Just one minor wiring error was found and corrected, giving me the green light to restore the ballast and scenery.
in Bakersfield, CA. Just one minor wiring error was found and corrected, giving me the green light to restore the ballast and scenery.
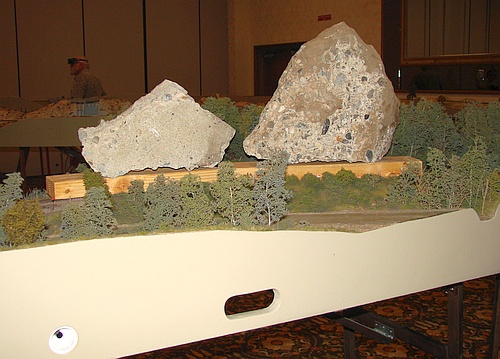
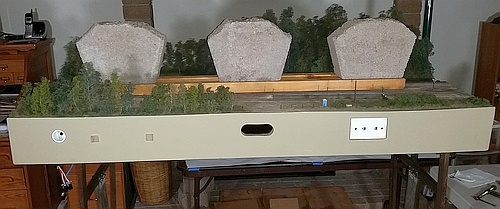
Below left: The track profile issue first caused problems at the 2015 Free-mo setup in Fresno, CA. In a
desperate attempt for a quick fix, a fellow Free-mo-er and I drove around the badlands of Fresno and found
these chunks of concrete, which we used as weight to try to flatten the foam top while gluing it back onto the
frame from beneath. It didn't work. This was Glen Frazer's last setup before restoration began in 2018.
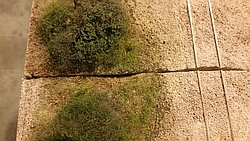
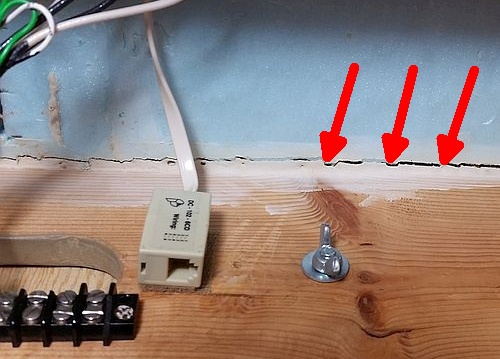
Below right: An example of a cracked latex Liquid Nails adhesive joint (red arrows for emphasis).
desperate attempt for a quick fix, a fellow Free-mo-er and I drove around the badlands of Fresno and found
these chunks of concrete, which we used as weight to try to flatten the foam top while gluing it back onto the
frame from beneath. It didn't work. This was Glen Frazer's last setup before restoration began in 2018.
Below right: An example of a cracked latex Liquid Nails adhesive joint (red arrows for emphasis).
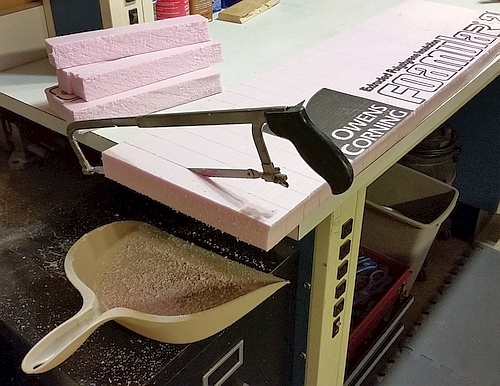
Below: The simplest solution was to re-attach the foam tops to the
wood frames using light-weight foam blocks affixed with Gorilla glue.
Here I am cutting the blocks, which are each 1.5" x 1.5" cross-section.
This provides a significant increase in glue-able surface area to
ensure the glue joints will be very strong and stable over time.
wood frames using light-weight foam blocks affixed with Gorilla glue.
Here I am cutting the blocks, which are each 1.5" x 1.5" cross-section.
This provides a significant increase in glue-able surface area to
ensure the glue joints will be very strong and stable over time.
Below: I also removed the old NCE brand BD20 current
detectors because their sensitivity cannot be adjusted.
This caused problems for the MSS detection system
when a FRED-equipped car was on the track - the
flashing FRED intermittently draws a higher current,
which caused the signals to also flash.
detectors because their sensitivity cannot be adjusted.
This caused problems for the MSS detection system
when a FRED-equipped car was on the track - the
flashing FRED intermittently draws a higher current,
which caused the signals to also flash.
Below: In contrast, the Loading Ramp and West Switch
sections were stood upright while boards, loaded with heavy
landscaping blocks, were carefully placed on the track to
press the foam top onto the frame. The pink foam blocks
were then glued in from underneath. Oh, my aching back!
sections were stood upright while boards, loaded with heavy
landscaping blocks, were carefully placed on the track to
press the foam top onto the frame. The pink foam blocks
were then glued in from underneath. Oh, my aching back!
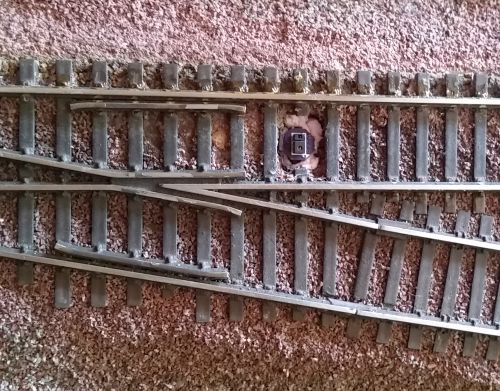
With the module sections mated and carefully leveled, I used a laser line level to ensure the new cork roadbed and track were
flat throughout the module. The turnouts on the Derail section (leading to the MofW siding) and on the West Switch (for the
siding track) were left in place, and used as the baseline references - the new track was installed between these two turnouts.
flat throughout the module. The turnouts on the Derail section (leading to the MofW siding) and on the West Switch (for the
siding track) were left in place, and used as the baseline references - the new track was installed between these two turnouts.
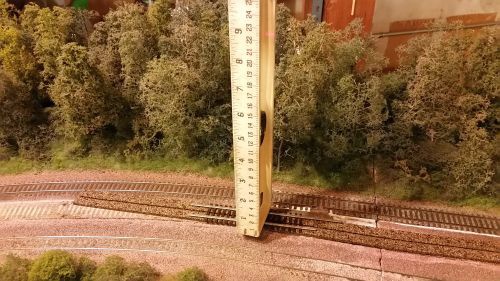
Below: I used a white level with the laser line shining on its inch
markings to determine what areas of the cork roadbed needed to
be lowered and which areas raised. In the low areas, new cork
was overlaid on top the old cork using latex Liquid Nails adhesive.
markings to determine what areas of the cork roadbed needed to
be lowered and which areas raised. In the low areas, new cork
was overlaid on top the old cork using latex Liquid Nails adhesive.
Below: Once cured, the repaired cork roadbed was shaved down
using a Sure-Form tool, with frequent checks of height against the
laser line level and side-to-side level using bubble levels.
using a Sure-Form tool, with frequent checks of height against the
laser line level and side-to-side level using bubble levels.
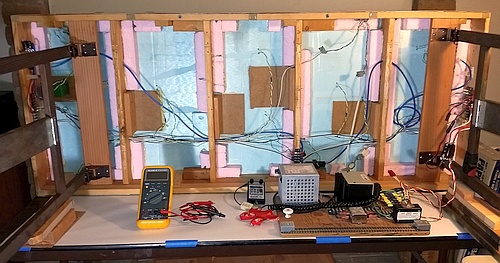
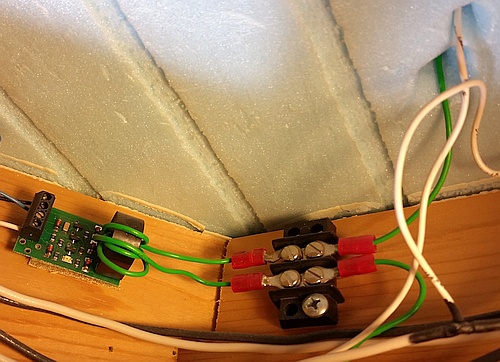
A consequence -- indeed, a side benefit -- of this restoration project was that most of the
wiring and electronics had to be removed to make space for the foam blocks used to stabilize
the foam tops. Because Glen Frazer was the prototype and test bed for my invention, the
Modular Signal System (MSS), the wiring methods and electronics had become dated
and were no longer fully compliant to the current V2.0 MSS standard. Once track repairs
were complete, I replaced and updated the module wiring and MSS electronics.
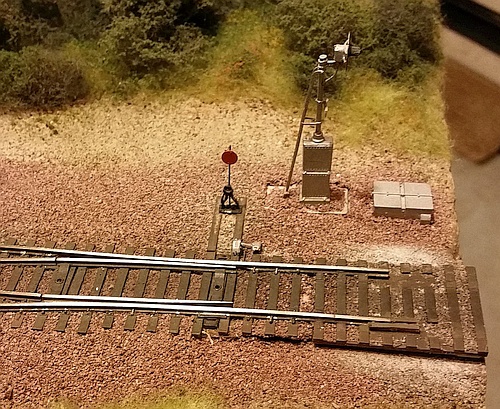
Below: Iowa Scaled Engineering (ISE) brand integrated
MSS Cascade boards (the large board) were installed in
the East Switch and West Switch sections. This product
(no longer available) incorporates the MSS Cascade, two
current detectors, one optical detector, and two signal
drivers. I also re-installed a stand-alone AutoBlock signal
driver from TracTronics (no longer available) to eventually
control the leave-siding signal. To provide 12 volts DC to
the Tortoise turnout motor, I used an old OBUB-2, which has
a 12 volt regulator powered from the MSS Accessory Bus.
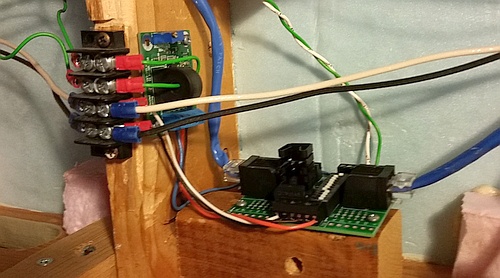
Below: New ISE current detectors (upper left) have been installed
on the Derail and Loading Ramp sections. The ISE sensor's current
sensitivity is set to detect the FRED's nominal current draw, solving
the "flashing signals" problem. The ISE boards are connected to my OBUB-3 boards (middle), which has a built-in 12 volt regulator for
powering the ISE detector and local Tortoise motors.
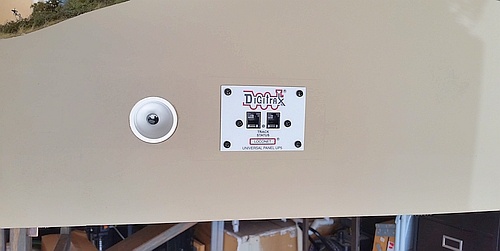
During the 2019 Bakersfield setup, I discovered that Glen Frazer's original commercial phone panels used for the
LocoNet throttle jacks were no longer reliable, prompting me to rebuild the LocoNet using Digitrax UP5 panels.
LocoNet throttle jacks were no longer reliable, prompting me to rebuild the LocoNet using Digitrax UP5 panels.
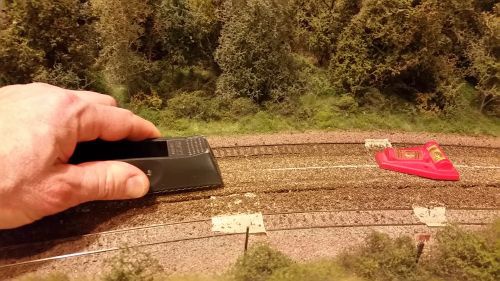
Below: The Loading Ramp section with foam blocks completed.
Here, I'm testing the new ISE current detector (discussed below).
Here, I'm testing the new ISE current detector (discussed below).
Left: I replaced the old, large Optek brand optical sensors
with new smaller ISE sensors, as seen here before I added
filler tie material and ballast around it (see my method here).
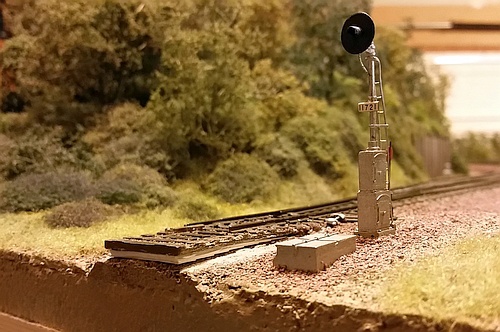
Below: The cantilever signal was protected with a box to
prevent damage as I worked on the nearby optical sensor,
surrounded by blue tape.
with new smaller ISE sensors, as seen here before I added
filler tie material and ballast around it (see my method here).
Below: The cantilever signal was protected with a box to
prevent damage as I worked on the nearby optical sensor,
surrounded by blue tape.
Below: the rail was hand-painted with Floquil Roof Brown,
a slightly lighter shade than the Krylon.
a slightly lighter shade than the Krylon.
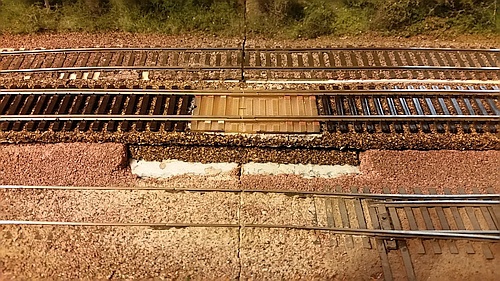
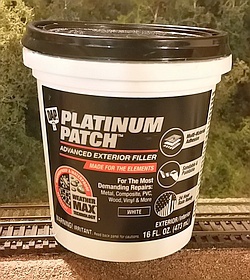
Below left: The section joints had some rather unsightly gaps and offsets in track ballast and surrounding scenery.
I used an outdoor-grade filler to solve this in conjunction with re-ballasting the track at the section joints.
I used an outdoor-grade filler to solve this in conjunction with re-ballasting the track at the section joints.
To get a very tight joint, I applied
the DAP brand filler (below) to
the end plates and belt-sanded it
down to a flat surface (right). I then
cut ABS styrene to the scenic
profile, lightly coated it with olive oil
to prevent sticking to the endplate,
and taped it in place. The modules
were then mated, leveled, and
precisely aligned. I spread scenery
dirt and ballast over the joint, filling
in around the styrene "dam", and
fixed it in place with diluted white
glue (far right). Once dry, the
modules were separated and
the styrene dam removed.
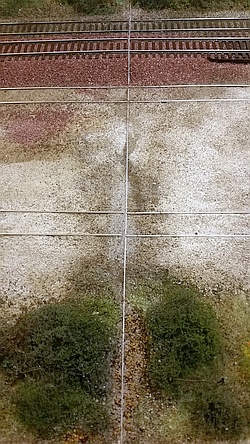
Left: The finished endplate. The
white filler has filled in where the
blue foam tops had shrunk back
away from the wooden endplate
surface, providing a fresh "base"
for the new scenery material and ballast. I added small amounts of
my "fallen leaves" mixture, fuzz
grass, and puff bushes to blend
the repaired scenic dirt into the
adjacent areas. I re-ballasted the
remainder of the repaired track
in the traditional way, using small
brushes and affixed with diluted
white glue.
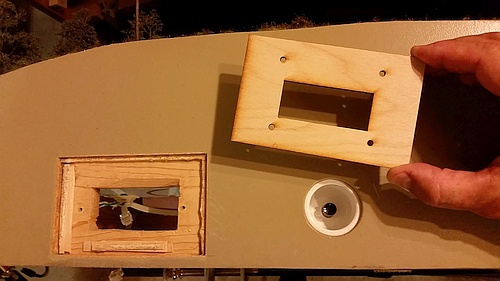
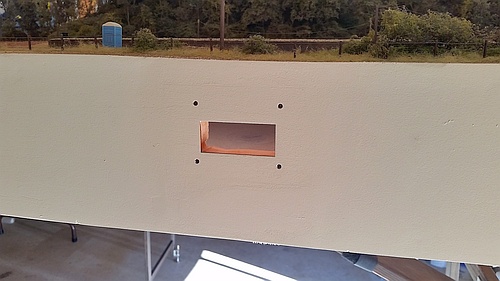
Below: After removing the old phone panels, I glued in custom-made
laser-cut filler plates from Prawn Designs into the unsightly holes.
Basswood strips were added for extra support as needed.
laser-cut filler plates from Prawn Designs into the unsightly holes.
Basswood strips were added for extra support as needed.
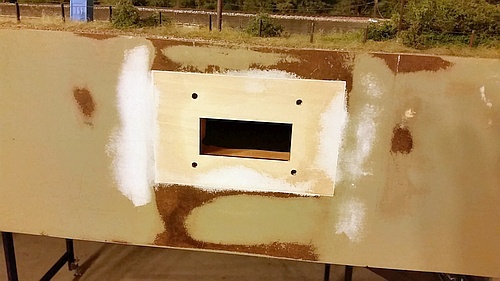
Below: I filled the gaps with the outdoor-grade filler (white),
and sanded smooth. I also repaired other minor damage
to the fascias that had accumulated over the years.
and sanded smooth. I also repaired other minor damage
to the fascias that had accumulated over the years.
Below: I repainted the fascias Glidden brand "great desert"
latex, the standard fascia color for California Free-mo modules.
latex, the standard fascia color for California Free-mo modules.
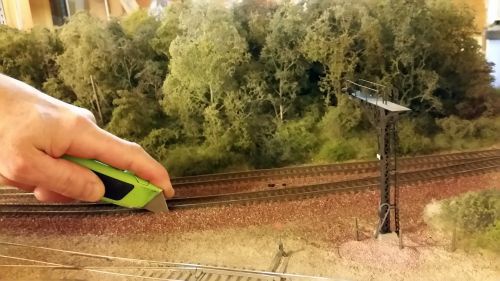
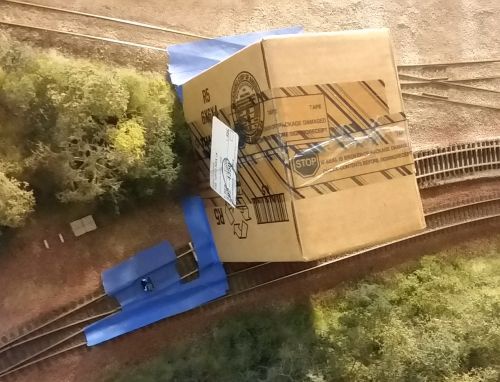
Below: Once all four sections had the pink foam blocks in place,
The main track on the Derail, Ramp, and West Switch was sprayed
with water to loosen the ballast, which was then cut along the tie
edges so the bad track could be pulled up with minimal damage
to the surrounding scenery. And yes, I bumped the cantilever a few
times but managed not to destroy it, thank heavens!
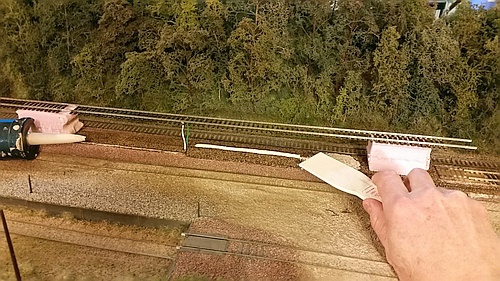
Below: The siding track had a bad dip at the Derail/Ramp
section joint, but otherwise was acceptable so I didn't tear it all
out. Rather, I used a modified hacksaw blade (background)
to undercut the track and loosen it from the underlying foam.
Custom-made styrene shims were fabricated, foreground,
and wedged under the track to raise it back to level.
section joint, but otherwise was acceptable so I didn't tear it all
out. Rather, I used a modified hacksaw blade (background)
to undercut the track and loosen it from the underlying foam.
Custom-made styrene shims were fabricated, foreground,
and wedged under the track to raise it back to level.
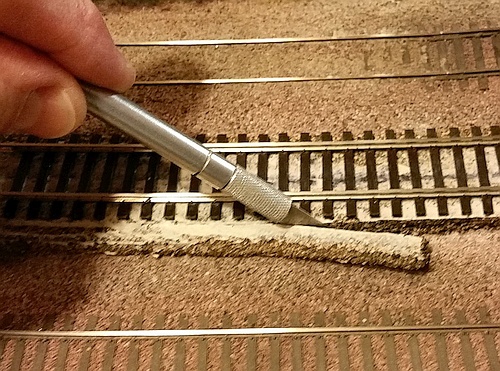
Below: Excess cork was trimmed away before painting track.
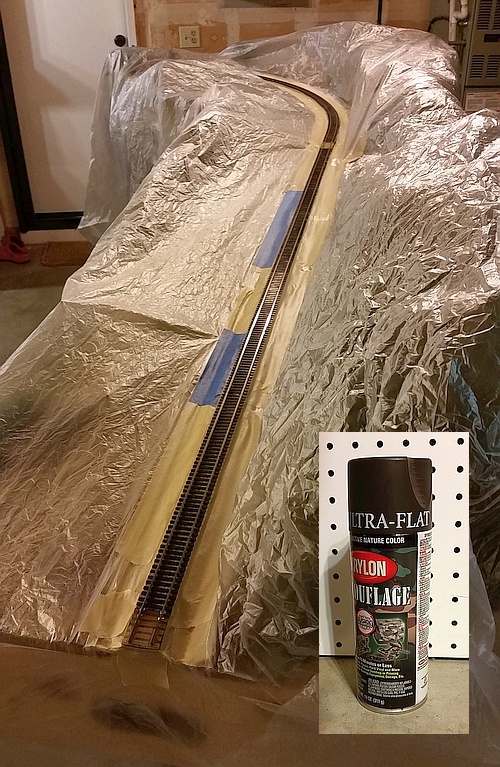
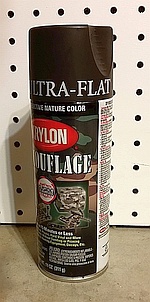
Below: The surrounding scenery was covered before painting the
track with Krylon ultra-flat "camouflage" brown spray paint (inset).
track with Krylon ultra-flat "camouflage" brown spray paint (inset).
Below: Digitrax UP5 throttle panels were screwed into
place, completing the restoration and updates. Glen Frazer
should be good for another 20 years of service!
place, completing the restoration and updates. Glen Frazer
should be good for another 20 years of service!
-- About
-- Contact
-- Diesels
-- Links
entire website copyright Gregg Fuhriman
created with CoffeeCup Visual Site Designer
created with CoffeeCup Visual Site Designer
-- Layouts
-- Modules
-- Signalling