|
|


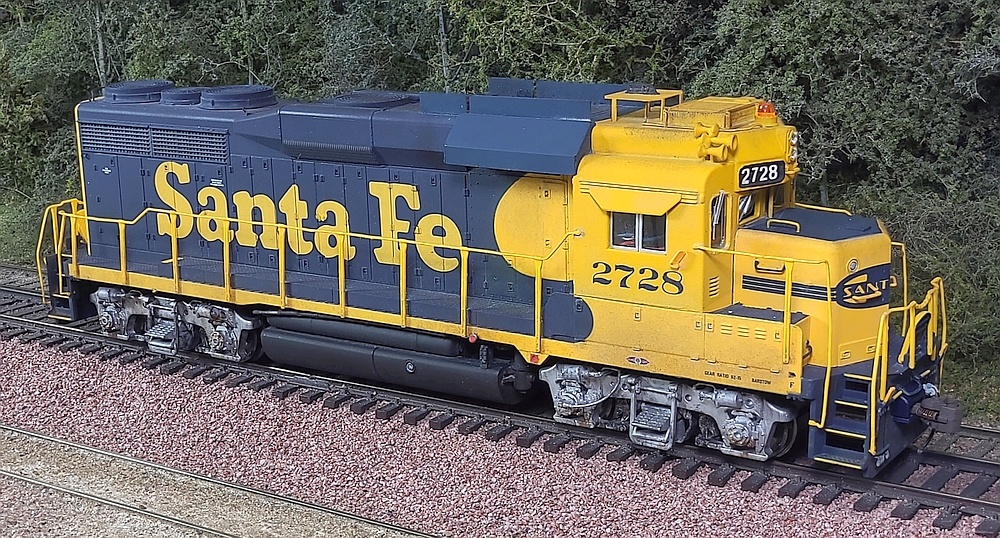
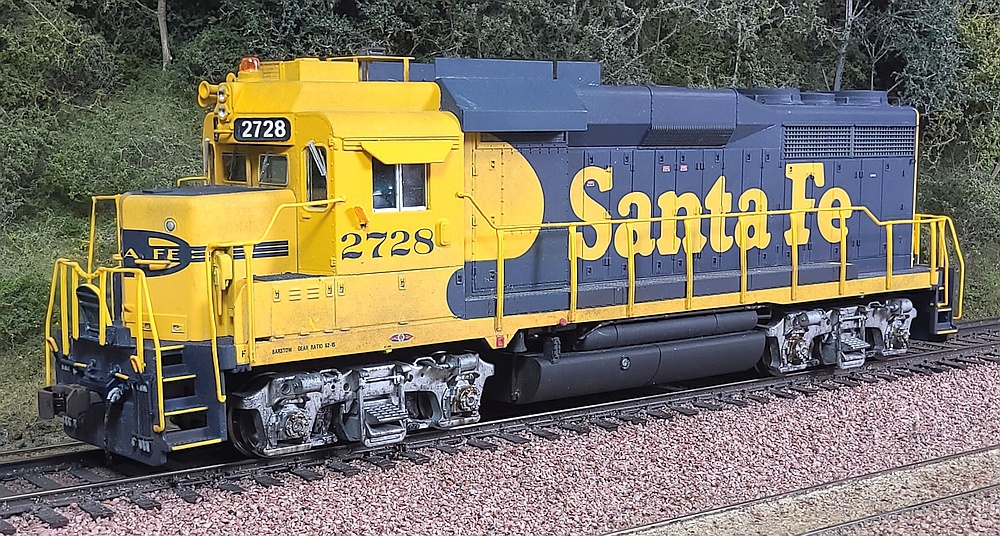
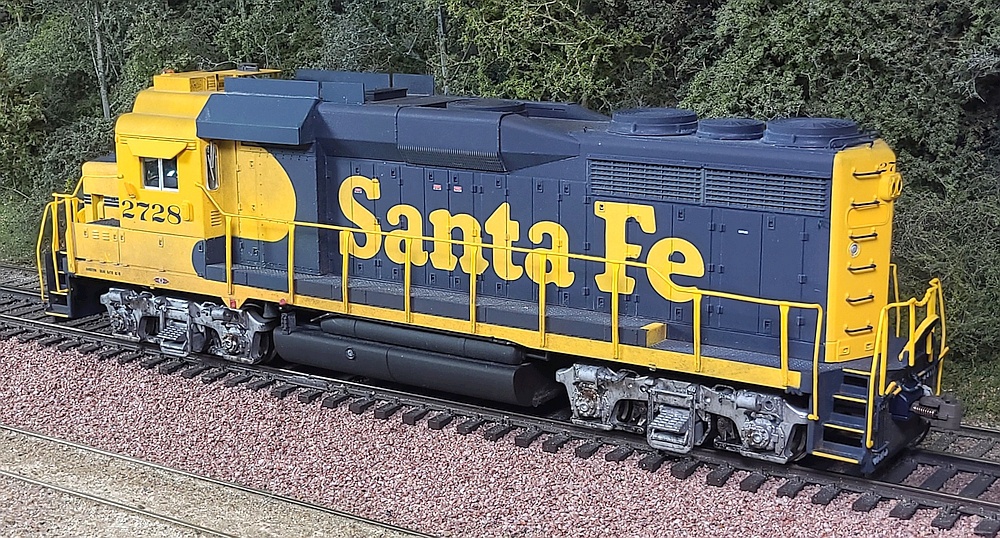


ATSF GP30u 2728
I started with a Walthers Proto model decorated in Santa Fe warbonnet.
To replicate a Santa Fe rebuilt GP30, I modified the windshield to a flat profile,
reworked the fuel cut-off panels, and installed exhaust lifters and air intake shrouds.
I also corrected the right-side battery box, added and modified details, and renumbered
the unit to 2728. I also replaced the lights with brighter LEDs and installed DCC with sound.
Weathering is a combination of artist oils and powdered chalks.
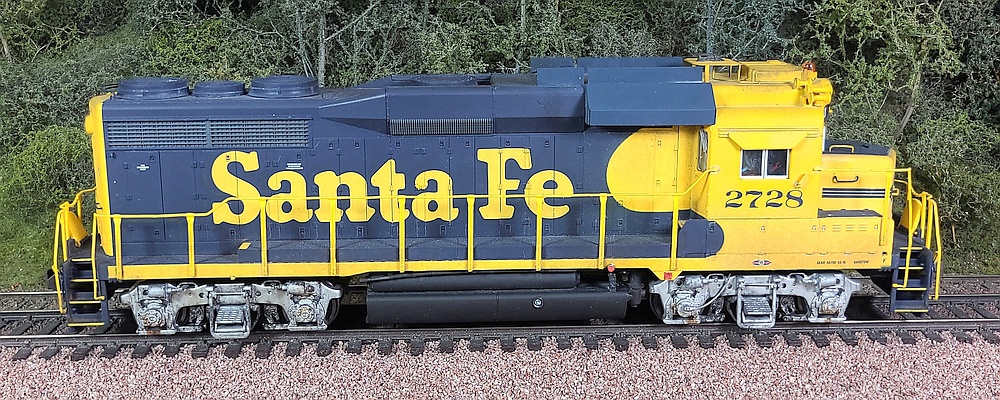
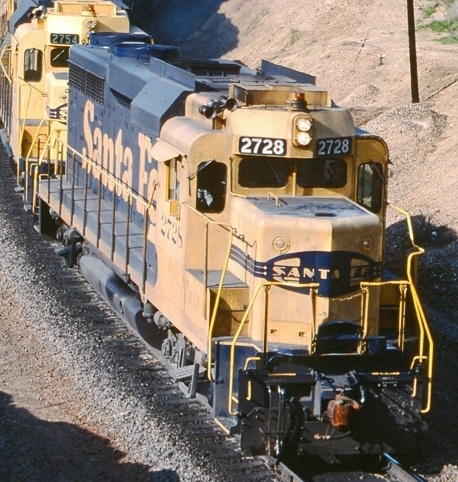
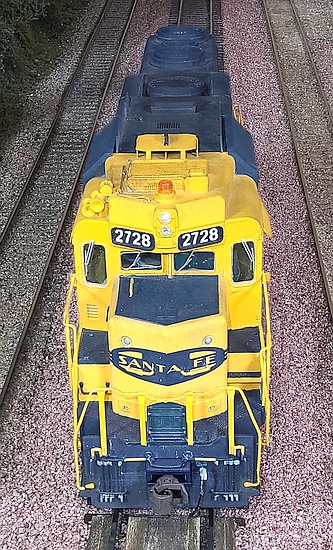
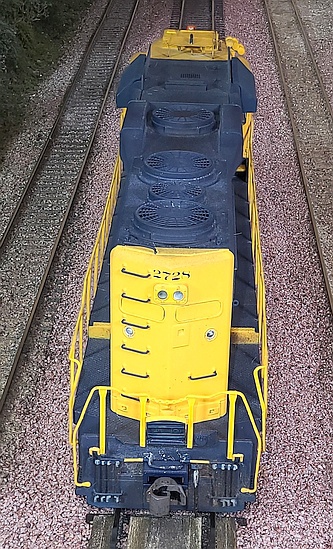
Right: This photo of the prototype 2728 is the inspiration for my model.
It shows most of the important details I tried to replicate, including the
early-1980's era exhaust lifters and air intake shrouds behind the unique
GP30 cab. These were intended to reduce the amount of diesel exhaust
that found its way into the air intakes. Many GP30u and GP35u rebuilds
got them, as well as a number of other ATSF locos in the early 1980's.
For whatever reason they didn't last long - most had been removed by
1990.
This shot also shows the "flat" profile of the cab front as reworked
by Santa Fe shops during rebuild, which reduced costs by using
standardized EMD cab window glass panels (GP30's originally had
a "V" profile, which required a slightly different size of glass).
Thanks to the photographer for sharing this image online.
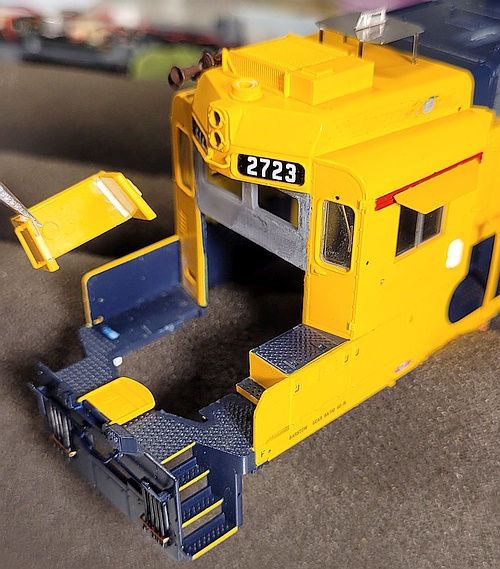
Here is how I rebuilt the cab front have a flat profile:
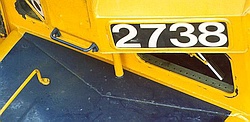
Right: A prototype photo of ATSF 2738 clearly showing the V removal.
Below Left: The stock "V" profile on a stock WalthersProto GP30.
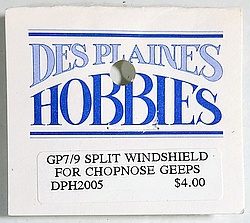
Below Mid: I used this part from Des Plaines Hobbies - it has the
proper window shape including seal beads surrounding the openings
and an interior inset to accept clear plastic "glass".
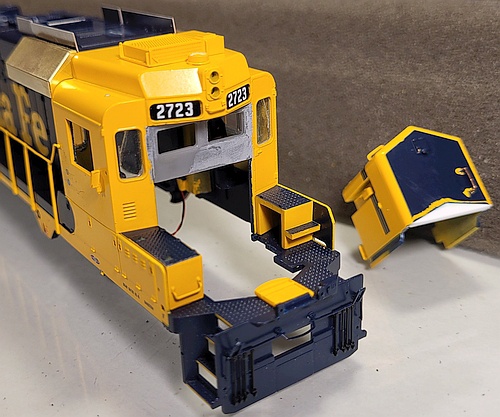
Below Right: I cut out the "V" windshield panels and spliced in the flat
Des Plaines Hobbies panel. This required some careful filing to get a
tight, clean fit. I also filled the "V" notch in the nose with a chunk of
styrene. The cab and nose were then repainted to hide the rework.
Right: A prototype photo of ATSF 2738 clearly showing the V removal.
Below Left: The stock "V" profile on a stock WalthersProto GP30.
Below Mid: I used this part from Des Plaines Hobbies - it has the
proper window shape including seal beads surrounding the openings
and an interior inset to accept clear plastic "glass".
Below Right: I cut out the "V" windshield panels and spliced in the flat
Des Plaines Hobbies panel. This required some careful filing to get a
tight, clean fit. I also filled the "V" notch in the nose with a chunk of
styrene. The cab and nose were then repainted to hide the rework.
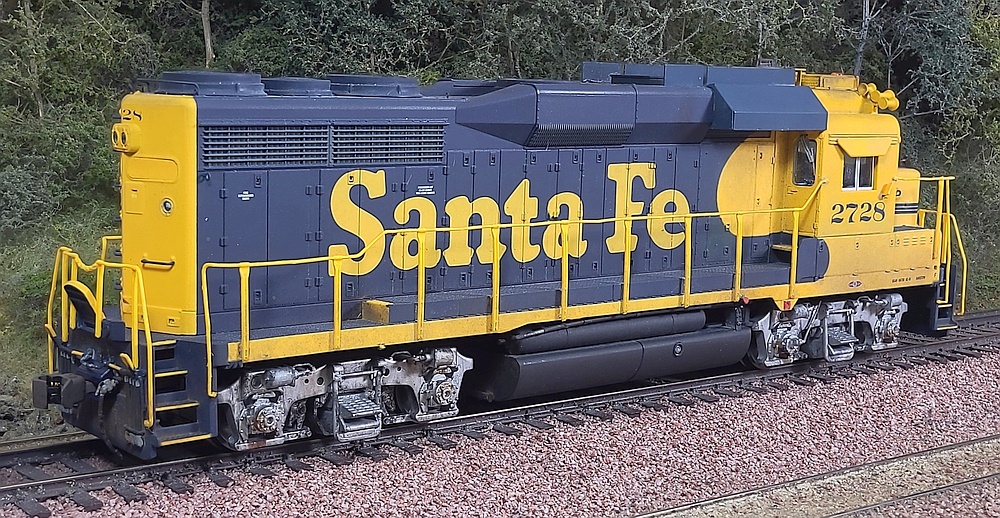
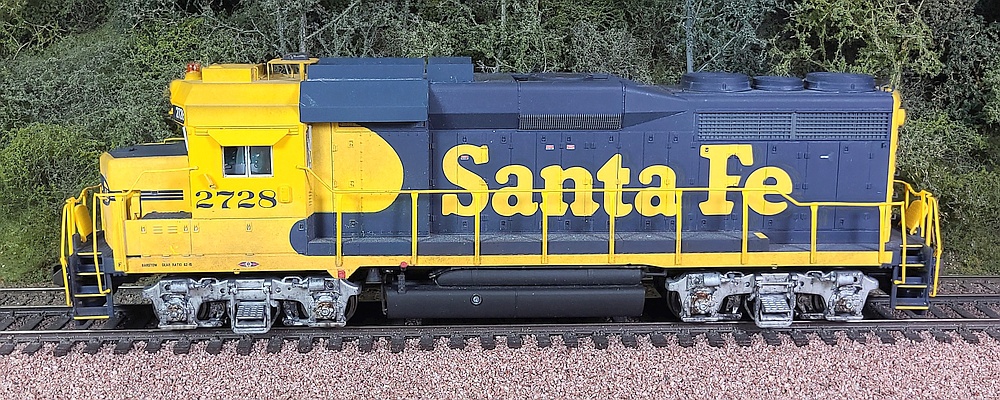
I used Plano Models 14801 brass etched metal kit for the exhaust lifters (the flat panels on top behind
the cab) and air intake shrouds (the angled boxy things behind the rounded portion of the cab).
Note also the cab front "flat" profile, and the shortened battery box ahead of the cab.
the cab) and air intake shrouds (the angled boxy things behind the rounded portion of the cab).
Note also the cab front "flat" profile, and the shortened battery box ahead of the cab.
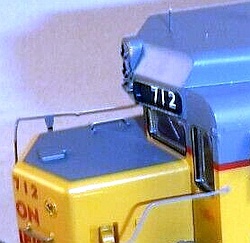
The end detailing is mostly stock. I used a
KV Models CF7 etched metal radio platform,
and a Cal Scale 583 Nathan M3HR airhorn
on a custom-made mount to get that unique
GP30 angled horn position.
Note the "flat" windshield profile.
KV Models CF7 etched metal radio platform,
and a Cal Scale 583 Nathan M3HR airhorn
on a custom-made mount to get that unique
GP30 angled horn position.
Note the "flat" windshield profile.
I cut off, modified, and re-attached the angular bracket surrounding the red fuel cut-off switch (hanging below the sidesill ahead
of the fuel tank). Fuel fillers are added to the sidesill, and new fuel sight glass parts were added to the fuel tank, just as Santa Fe
did during the GP30u rebuild program. Per Santa Fe practice, the outside brake shoes and brackets were removed.
of the fuel tank). Fuel fillers are added to the sidesill, and new fuel sight glass parts were added to the fuel tank, just as Santa Fe
did during the GP30u rebuild program. Per Santa Fe practice, the outside brake shoes and brackets were removed.
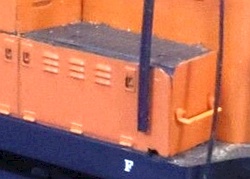
It's a subtle thing, but when I noticed this error on my GP30 shell, it bothered me enough to
figure out how to fix the right-side battery box to better match the prototype arrangement:
Right: here is the original battery box seen on a stock Proto GP30. Note how there is no "setback"
of the front of the box - this surface should be further back aligned with the handrail stanchion.
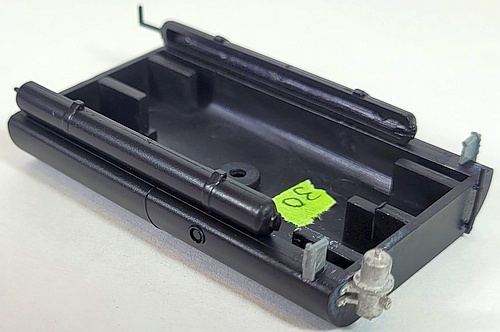
Below Left: I popped off the battery box piece, removed a small section from the rear area
(where it angles to match the cab profile), and glued the rear vertical support back on.
Below Right: I then reinstalled the modified box with the proper setback.
I filled the small walkway hole with styrene.
figure out how to fix the right-side battery box to better match the prototype arrangement:
Right: here is the original battery box seen on a stock Proto GP30. Note how there is no "setback"
of the front of the box - this surface should be further back aligned with the handrail stanchion.
Below Left: I popped off the battery box piece, removed a small section from the rear area
(where it angles to match the cab profile), and glued the rear vertical support back on.
Below Right: I then reinstalled the modified box with the proper setback.
I filled the small walkway hole with styrene.
Below: I added vertical fuel sight glasses
and a Details West air filter to the fuel tank.
and a Details West air filter to the fuel tank.
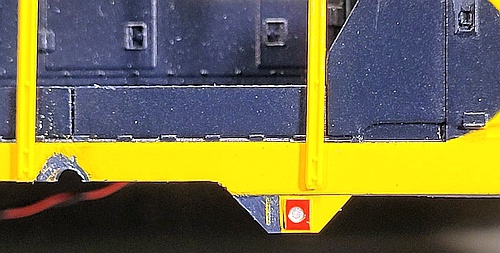
Below: For the fuel cut-off button bracket, I cut off the larger stock
bracket, cut it down to size, filed off the vertical sight glass, reworked the sidesill profile, and reattached the modified part.
The half-circle cutout on the left is where the new fuel fillers fit.
bracket, cut it down to size, filed off the vertical sight glass, reworked the sidesill profile, and reattached the modified part.
The half-circle cutout on the left is where the new fuel fillers fit.
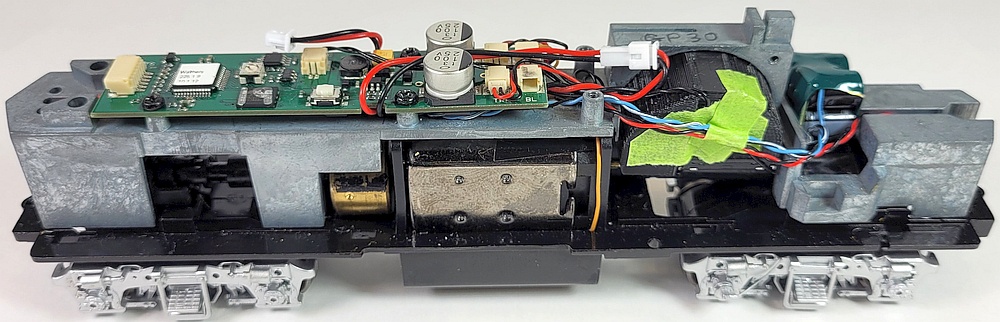
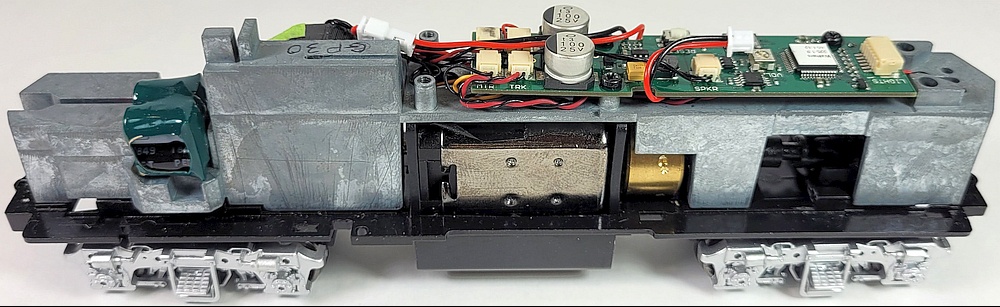
Below: On the drive, I replaced the DC board with a WalthersProto GP30-specific Soundtraxx Tsunami-1 sound
decoder obtained through Walthers replacement parts department. I installed a Scale Sound Systems 3D-printed
speaker enclosure with speaker, which sounds awesome. I also managed to fit a TCS KA-4 keep-alive in the cab area.
decoder obtained through Walthers replacement parts department. I installed a Scale Sound Systems 3D-printed
speaker enclosure with speaker, which sounds awesome. I also managed to fit a TCS KA-4 keep-alive in the cab area.
-- About
-- Contact
-- Diesels
-- Links
entire website copyright Gregg Fuhriman
created with CoffeeCup Visual Site Designer
created with CoffeeCup Visual Site Designer
-- Layouts
-- Modules
-- Signalling